LaserJet II, IID, III, IIID, Apple LaserWriter II and about 300 others
This post is a brain dump on a printer that I have repaired hundreds of times. It may have some minor errors and will not be comprehensive. I will add images within the next week or so.
Error 50 was, by far, the most common error code we had on these printers. The cause is a failure of the fuser to come to the proper temperature within a time limit.
Common Causes
Usually the cause is either the AC power supply or the fuser although it can occasionally be caused by other systems such as the DC Controller or connections.
When the printer goes to print the job is first processed by the controller board. Once the job is ready the DC controller signals the AC power supply to apply voltage to the halogen lamp in the fuser. The DC controller then monitors the temperature of the fuser roller through the thermistor and, once the target temperature is reached, turns the lamp off. The lamp is then cycled on and off too keep it within a certain range.
Troubleshooting
Thermal Management
The voltage from the AC power supply is applied through the 2 contacts on one end of the fuser. This power is routed through a thermal fuse that rides on the heat roller inside the fuser. The thermal fuse will blow, shutting off the halogen lamp, if the fuser temperature exceeds a safe limit. The thermal fuse will have to be replaced after the root cause is repaired. Thermal fuse failures are very uncommon but, if you suspect it, then look at the AC power supply, DC controller and the fuser on signal between the two. A dirty thermistor could also cause an overheating issues since the debris on it will form an insulator that makes the temperature readings low. If there is a build up on the thermistor it will also usually ruin the upper heat roller by wearing through the non-stick coating. The thermal fuse should have continuity through it. The thermistor should not be open and should have a resistance since it is a thermal resistor.

The thermistor is the soft faced square part with Kapton tape covering and is mounted inside the fuser. The thermal fuse is the hard round part. In This is an old fuser with severe buildup on both the thermistor and thermal fuse. They need to be cleaned using silicon oil (Wear Gloves!)
The Fuser

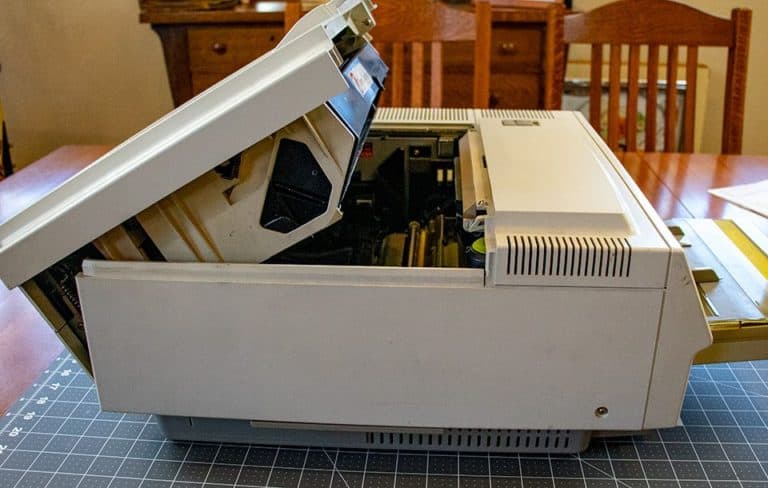
After the error occurs open the printer and carefully feel the fuser to see if it is getting any heat at all. One way to do this is to feel the cover or remove the fuser cleaning wand from under the fuser cover. If there is any heat at all then the AC power supply is probably fine and the fuser is your likely culprit. Otherwise its a roll of the dice between the fuser and AC power supply.

The fuser is heated by a halogen lamp that runs inside the heat roller. This lamp is extremely sensitive to failure due to contamination on the glass sleeve. I have seen a halogen lamp in a copier fail with a fingerprint clearly visible as plated tungsten on the inside of the glass tube! Anytime the halogen lamp is handled it should be done with gloves on and the entire glass tube needs to be thoroughly cleaned with alcohol before re-installation. If any oils or grease are left on the lamp that will cause a hot spot which will prevent the tungsten from recirculating onto the element inside the tube. It will then build up on the inside of the glass envelope until the element burns out. Usually this appears as a dark spot on the inside of the lamp.

Anytime you are in a machine clean the fuser pawls (Commonly called picker fingers). These get a build up of toner and debris that will wear out the fuser roller. Just carefully remove the build up with your fingers. If the tip breaks off then the finger MUST be replaced or it will destroy the roller very quickly.
Back in the day I would rebuild fusers in batches of 6 (Its what fit on the bench comfortably) so we usually had them in stock. Of course this means we rarely spent time troubleshooting Error 50’s. Instead we just swapped in a fuser to see if that fixed the issue. If it did then the old fuser was either replaced or, if it looked to be in good mechanical condition, then I would fix it. Burnt out lamps were common but failed thermistors are also a common cause.

If the fuser was not the issue then swapping out the AC power supply almost always did the trick. The AC power supply is the silver unit next to the fuser under the rear fan. This was a very common issue and this part underwent several revisions early is the Canon SX engines’ life cycle. Early on we just replaced the bad power supplies with ones of the newer design. Later on we would exchange the bad ones for rebuilt units from a vendor. In the image above the fuser and fan have been removed to clearly show the power supply.
Finally there was the VERY rare occasion that the fuser and AC power supply did not fix the issue. In these cases the issue was occasionally the signal cable from the Fuser to the DC power supply not making good contact. This cable is pretty reliable but if it gets debris into it while the fuser is out of the printer then it can go bad. This is the connection on the left end of the fuser as you are facing the front of the printer. Sadly, this cable was rarely the issue and, early on, the prohibitively expensive (at the time) DC controller was usually the cause. Later on we could get a repaired DC controller with an exchange of the bad one for an acceptable cost although it was still an expensive repair.